Arugula microgreens are a popular choice for those looking to grow nutrient-packed greens in a small space. These tiny greens are easy to grow, full of flavor, and packed with nutrients. In this article, we will provide you with all the information you need to grow arugula microgreens successfully.
To start, it’s important to understand what arugula microgreens are and why they are so beneficial. Arugula microgreens are the young shoots of the arugula plant, harvested just a few weeks after planting. They are a great source of vitamins and minerals, including vitamins A, C, and K, calcium, iron, and potassium. Plus, they are low in calories and high in fiber, making them an excellent addition to any diet.
In the following paragraphs, we will discuss the steps you need to take to grow arugula microgreens successfully. From selecting the right growing medium to providing the right amount of light and water, we will provide you with all the information you need to start growing your own arugula microgreens at home.
Understanding Arugula Microgreens
Arugula microgreens are a popular vegetable in the world of microgreens. They are a member of the Brassicaceae family and are classified under the scientific name Eruca sativa. Arugula microgreens are a great source of vitamins and minerals and have a unique flavor that is often described as peppery and nutty.
Microgreens are young plants that are harvested when they are only a few inches tall. They are grown in trays and are harvested before they reach maturity. Arugula microgreens are grown in a similar way as other microgreens and require minimal space and resources.
Arugula microgreens are a great addition to salads, sandwiches, and other dishes. They have a distinct flavor that sets them apart from other microgreens. The flavor of arugula microgreens is often described as spicy, peppery, and nutty.
Arugula microgreens are easy to grow and require minimal care. They can be grown in a variety of soils and do not require any special equipment. They are also relatively quick to grow and can be harvested in as little as two weeks.
In terms of taxonomy, arugula microgreens are classified under the scientific name Eruca sativa. They belong to the Brassicaceae family, which also includes other vegetables such as broccoli, cauliflower, and kale.
Overall, arugula microgreens are a great addition to any diet. They are easy to grow, have a unique flavor, and are packed with nutrients. Whether you are a seasoned gardener or a beginner, arugula microgreens are a great vegetable to grow.
Health Benefits of Arugula Microgreens
Arugula microgreens are packed with nutrients and offer a range of health benefits. Here are some of the key health benefits of arugula microgreens:
Rich in Vitamins and Minerals
Arugula microgreens are a great source of vitamins and minerals, including vitamin C, vitamin A, vitamin K, calcium, iron, potassium, and magnesium. These vitamins and minerals are essential for maintaining good health and can help to prevent a range of diseases.
High in Antioxidants
Arugula microgreens are high in antioxidants, which can help to protect the body against damage from free radicals. Antioxidants are also important for maintaining healthy skin and preventing premature aging.
Supports Bone Health
Arugula microgreens are a good source of calcium, which is essential for maintaining strong bones and teeth. They also contain vitamin K, which plays a key role in bone metabolism and can help to prevent osteoporosis.
Boosts Immune System
Arugula microgreens are rich in vitamin C, which is essential for a healthy immune system. Vitamin C can help to protect the body against infections and can also help to reduce the severity of colds and other respiratory infections.
May Help to Prevent Cancer
Arugula microgreens contain a range of phytochemicals, including sulforaphane and indole-3-carbinol, which have been shown to have anti-cancer properties. These compounds can help to prevent the growth of cancer cells and may also help to reduce the risk of developing certain types of cancer.
Supports Heart Health
Arugula microgreens are a good source of folate, which is important for maintaining a healthy heart. Folate can help to reduce the risk of heart disease by lowering levels of homocysteine, an amino acid that can damage blood vessels.
Overall, arugula microgreens are a nutrient-dense food that offers a range of health benefits. Adding them to your diet can help to improve your overall health and well-being.
Choosing the Right Seeds and Containers
When it comes to growing arugula microgreens, selecting the right seeds and containers is crucial. Here are some tips to help you choose the best options:
Seeds
It’s essential to use high-quality arugula seeds to ensure a successful harvest. When purchasing seeds, look for reputable brands and check the packaging date to ensure freshness. Also, consider the variety of arugula seeds you want to use. Some popular options include wild rocket, Italian arugula, and astro arugula.
Containers
The container you choose will depend on your preferences and available space. You can use anything from plastic trays to clay pots, as long as they have drainage holes. However, it’s essential to ensure that the container is clean and free of any chemical residue that could harm your microgreens.
Another option is to use sprouting trays, which are specifically designed for growing microgreens. These trays often come with a built-in drainage system and are easy to stack, making them ideal for small spaces.
Recommended Sprouters
If you’re new to growing microgreens, using a sprouter can be a helpful tool. Sprouters are devices that make it easy to grow microgreens indoors. Some popular options include the Sproutman’s Soil-Free Wheatgrass Grower and the Tribest Freshlife Automatic Sprouter.
In conclusion, choosing the right seeds and containers is essential for growing healthy and delicious arugula microgreens. By following these tips, you’ll be well on your way to a successful harvest.
Preparing the Growing Medium
Growing arugula microgreens requires a well-draining growing medium that is rich in nutrients. Here are some steps to prepare the perfect growing medium for your arugula microgreens:
- Choose a Growing Medium: Arugula microgreens can be grown in soil, coconut coir, or organic potting soil. All three of these mediums provide excellent drainage and are nutrient-rich.
- Mix the Growing Medium: To prepare the growing medium, mix equal parts of soil, coconut coir, and organic potting soil. This mixture will provide the perfect balance of nutrients and drainage for your arugula microgreens.
- Add Drainage: To ensure proper drainage, add a layer of perlite or vermiculite to the bottom of your planting tray. This will prevent water from accumulating at the bottom of the tray and causing root rot.
- Moisten the Growing Medium: Before planting your arugula microgreens, moisten the growing medium by adding water until it is evenly damp. Be careful not to overwater, as this can lead to mold and other issues.
- Spread the Seeds: Once the growing medium is prepared, spread the arugula seeds evenly over the surface of the soil. Cover the seeds with a thin layer of the growing medium and mist with water.
By following these steps, you can prepare a high-quality growing medium that will provide the perfect environment for your arugula microgreens to thrive.
Planting and Germinating the Seeds
Arugula microgreens are easy to grow and require minimal effort. Here are the steps to plant and germinate arugula microgreen seeds:
- Soak the seeds in water for 4-6 hours to help speed up the germination process.
- Drain the water and rinse the seeds thoroughly.
- Spread the seeds evenly on a growing medium such as soil or a hydroponic mat.
- Cover the seeds with a thin layer of soil or vermiculite.
- Water the seeds gently to ensure the soil is moist but not waterlogged.
- Place the tray in a warm and bright location, but not in direct sunlight.
- Keep the soil moist by watering gently every day or two.
- Germination should occur within 3-5 days.
It is important to sow the seeds densely to ensure a good yield. A seeding density of 10-20 grams per square foot is recommended.
During the germination process, it is important to monitor the moisture levels and ensure that the soil does not dry out. Overwatering can cause the seeds to rot, so it is important to water gently and avoid waterlogging the soil.
In summary, planting and germinating arugula microgreen seeds is a simple process that requires minimal effort. With the right growing conditions and careful monitoring, you can enjoy a bountiful harvest of fresh and nutritious arugula microgreens.
Caring for Your Arugula Microgreens
Growing arugula microgreens is a great way to add fresh, nutrient-packed greens to your diet. To ensure the best possible growth and yield, it’s important to take proper care of your arugula microgreens. Here are some tips to help you do just that.
Light
Arugula microgreens require plenty of light to grow properly. Place them in a location that receives bright, indirect light for at least six hours a day. You can also use artificial lights to supplement natural light if necessary. Keep the lights about 6-12 inches above the plants and adjust them as the plants grow.
Watering
Arugula microgreens need to be kept moist, but not too wet. Water them regularly, but do not overwater. A spray bottle is a great way to water your microgreens, as it allows you to apply a fine mist of water without disturbing the delicate plants.
Bottom Watering
Another way to water your arugula microgreens is through bottom watering. This involves placing the container of microgreens in a tray of water and allowing the plants to absorb the water from the bottom up. This method helps prevent overwatering and encourages healthy root growth.
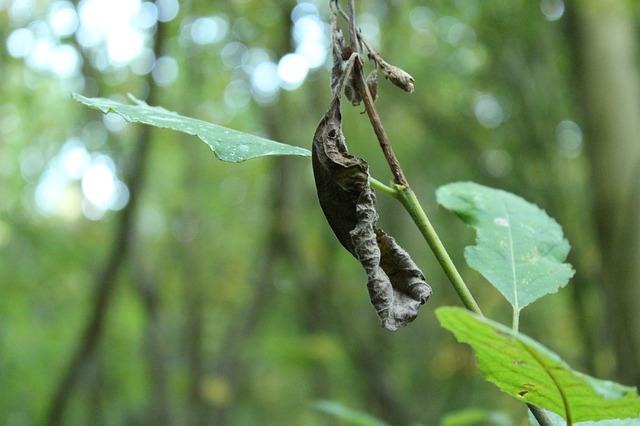
Disease
To prevent disease, it’s important to keep your arugula microgreens clean and free of debris. Remove any dead or yellowing leaves promptly, and avoid overcrowding the plants. If you notice any signs of disease, such as mold or mildew, remove the affected plants immediately to prevent the spread of the disease.
In summary, providing adequate light, proper watering, and keeping the plants clean and free of disease are essential for growing healthy and delicious arugula microgreens. With a little care and attention, you can enjoy fresh, nutrient-packed greens in just a few short weeks.
Harvesting Your Arugula Microgreens
When your arugula microgreens have reached the desired height of 1-2 inches, it’s time to harvest them. Harvesting microgreens is a simple process that can be done with scissors or a sharp knife.
First, gather all the necessary tools for harvesting, including scissors or a sharp knife. Make sure the tools are clean and sanitized before use.
Next, grasp the leaves of the microgreens near the base with one hand and use the scissors or knife to cut the stem near the soil surface with the other hand. It’s important to cut the stem cleanly to avoid damaging the remaining plant.
When harvesting, it’s important to only cut the leaves and not the true leaves, which are the second set of leaves that grow after the cotyledons. Cutting the true leaves can damage the plant and slow down its growth.
To harvest larger quantities of arugula microgreens, use a sharp knife to cut the entire tray of microgreens just above the soil surface. This method allows for a quicker harvest and reduces the risk of damaging the remaining plants.
After harvesting, rinse the microgreens in cold water and pat them dry with a clean towel. Store them in an airtight container in the refrigerator for up to 5 days.
In summary, harvesting arugula microgreens is a simple process that can be done with scissors or a sharp knife. It’s important to cut the stem cleanly and avoid cutting the true leaves. Rinse and store the microgreens properly to maintain their freshness.
Storing and Shelf Life of Arugula Microgreens
Arugula microgreens have a relatively short shelf life compared to mature arugula. Proper storage is crucial to maintain the quality and freshness of arugula microgreens. Here are some tips on how to store arugula microgreens:
- Temperature: Arugula microgreens should be stored at a temperature between 1-5°C (33.8-41°F) to extend their shelf life. Storing them at a higher temperature will cause them to wilt and spoil faster.
- Humidity: Arugula microgreens should be stored in a container with high humidity to prevent them from drying out. An airtight container with a damp paper towel or a mist of water can help maintain the humidity level.
- Airflow: Arugula microgreens should be stored in a container that provides good airflow. Excess moisture can cause the microgreens to rot, so it is important to allow for proper ventilation.
When stored properly, arugula microgreens can last up to 7 days. However, the shelf life may vary depending on the freshness of the microgreens when purchased and the storage conditions. It is important to check the microgreens regularly for any signs of spoilage.
In summary, storing arugula microgreens at a temperature between 1-5°C (33.8-41°F), in a container with high humidity and good airflow, can help extend their shelf life up to 7 days.
Incorporating Arugula Microgreens into Your Diet
Arugula microgreens are a great addition to any diet, as they are packed with nutrients and have a delicious peppery flavor. Here are some easy ways to incorporate arugula microgreens into your daily meals:
Salads
Arugula microgreens are a perfect addition to any salad. They add a nice crunch and a peppery flavor that pairs well with a variety of dressings. You can mix them with other greens like spinach or kale, or use them as a base for your salad.
Green Smoothies
If you’re a fan of green smoothies, arugula microgreens are a great addition. They blend well with other greens and fruits, and can add a nice kick to your smoothie. Just be sure to rinse them thoroughly before blending.
Sandwiches
Arugula microgreens can add a nice crunch and flavor to any sandwich. They pair well with a variety of meats and cheeses, and can also be used as a substitute for lettuce.
Pizza
Arugula microgreens make a great topping for pizza. They add a nice freshness and flavor that pairs well with tomato sauce and cheese. Just sprinkle them on top of your pizza before baking.
Soups
Arugula microgreens can be used as a garnish for soups, adding a nice pop of color and flavor. They pair well with creamy soups like tomato or squash, or can be used in a broth-based soup for added texture.
Baby Greens
Arugula microgreens are a great option for baby greens. They are easy to grow and can be harvested in just a few weeks. Use them as a base for your salads, or mix them with other baby greens for a nutrient-packed side dish.
Incorporating arugula microgreens into your diet is easy and can add a lot of flavor and nutrition to your meals. Try them out in different dishes and see how they can enhance your favorite recipes.
Growing Arugula Microgreens Hydroponically
Arugula microgreens are a popular and nutritious crop that can be grown hydroponically with great success. Here are some tips for growing arugula microgreens hydroponically:
Container
Choose a container that is suitable for hydroponic growing. A shallow container or tray with drainage holes is ideal. The container should be able to hold enough water to keep the grow mat or medium moist, but not so much that the microgreens become waterlogged.
Sprouting
To sprout the arugula seeds, spread them evenly over a hydroponic grow mat, such as a hemp mat. Make sure the seeds are not too crowded, as this can lead to poor germination. Cover the seeds with another layer of the grow mat and moisten with water.
Crop
Once the seeds have sprouted, remove the top layer of the grow mat and place the tray under grow lights. Arugula microgreens prefer bright, indirect light and should be kept at a temperature between 60-70°F. Water the microgreens regularly to keep the grow mat moist.
Hydroponic Grow Mat
A hydroponic grow mat is a great choice for growing arugula microgreens hydroponically. The mat provides a stable growing environment for the microgreens and helps to keep them moist. Choose a high-quality grow mat that is specifically designed for hydroponic growing.
Grow Lights
Grow lights are an essential component of hydroponic growing. Arugula microgreens require bright, indirect light to grow properly. Choose a high-quality grow light that is specifically designed for hydroponic growing.
Conclusion
Growing arugula microgreens hydroponically is a great way to produce a nutritious and delicious crop. With the right container, sprouting method, grow mat, and grow lights, you can produce a bountiful crop of arugula microgreens in no time.
Varieties of Arugula Microgreens
Arugula microgreens are a popular choice for growers due to their peppery flavor and the ease with which they can be grown. There are several varieties of arugula microgreens available, each with its own unique characteristics.
Garden Rocket
Garden rocket is a common variety of arugula microgreens that is easy to grow and has a mild, nutty flavor. It is a popular choice for salads and sandwiches due to its tender leaves and delicate texture. Garden rocket microgreens can be harvested in as little as 7-10 days after planting the seeds.
Rocket
Rocket microgreens are a more mature version of garden rocket, with a stronger, spicier flavor. They are a great addition to dishes that require a bit of heat, such as pizza or pasta. Rocket microgreens can be harvested in around 14 days after planting the seeds.
Other Varieties
There are several other varieties of arugula microgreens available, each with its own unique flavor and texture. Some popular options include:
- Wild Rocket: a more pungent and spicy version of rocket microgreens.
- Sylvetta: a variety with small, deeply lobed leaves and a nutty flavor.
- Wasabi: a variety with a distinct wasabi-like flavor and a bright green color.
When choosing which variety of arugula microgreens to grow, consider the flavor profile and texture you are looking for. Experiment with different varieties to find the perfect fit for your dishes.
Detailed Instructions for Growing Arugula Microgreens
Growing arugula microgreens is a simple and rewarding process that can be done in any season. Here are some detailed instructions to help you grow your own arugula microgreens:
- Choose the right container: A shallow container or tray with drainage holes is ideal for growing arugula microgreens. You can use plastic or ceramic trays, or even repurpose a recycled container.
- Fill the container with soil: Fill the container with a well-draining soil mix. You can use a commercial seed-starting mix or make your own by combining equal parts of peat moss, vermiculite, and perlite.
- Sow the seeds: Scatter the arugula seeds evenly over the soil surface. You can use a seed shaker or your fingers to distribute the seeds. Aim for a seed density of about 10-12 seeds per square inch.
- Cover and water: Cover the seeds with a thin layer of soil or vermiculite. Water the soil gently with a spray bottle or a watering can. Keep the soil moist but not waterlogged.
- Provide light: Place the container in a bright, sunny location or under grow lights. Arugula microgreens need at least 4-6 hours of direct sunlight or 12-16 hours of artificial light per day.
- Maintain humidity: Cover the container with a clear plastic lid or plastic wrap to maintain humidity. Remove the cover once the seeds have germinated.
- Monitor growth: Arugula microgreens will germinate in 3-5 days and will be ready for harvest in 7-10 days. Monitor the growth and water as needed.
- Harvest: Harvest the arugula microgreens when they reach a height of 1-2 inches. Use scissors to cut the microgreens just above the soil surface.
By following these growing instructions, you can enjoy fresh and delicious arugula microgreens in just a few weeks. Happy growing!
Frequently Asked Questions
What is the optimal temperature for growing arugula microgreens?
Arugula microgreens grow best in temperatures between 60°F and 70°F. Temperatures above 75°F can cause the plants to bolt or become bitter.
How often should I water my arugula microgreens?
Arugula microgreens require frequent watering to keep the soil moist. Watering once or twice a day is usually sufficient, depending on the humidity and temperature of the growing environment.
What is the best soil mix for growing arugula microgreens?
A soilless mix made from equal parts of peat moss, vermiculite, and perlite is ideal for growing arugula microgreens. The mix should be moist but not waterlogged.
How long does it take for arugula microgreens to germinate?
Arugula microgreens typically germinate within 2-3 days and are ready to harvest in 7-10 days.
Can I grow arugula microgreens without soil?
Yes, arugula microgreens can be grown hydroponically or using a growing medium such as coconut coir or hemp mats. However, it is important to provide adequate nutrients and water to ensure healthy growth.
What are the benefits of eating arugula microgreens?
Arugula microgreens are a rich source of vitamins and minerals, including vitamin C, vitamin K, and folate. They also contain antioxidants and may have anti-inflammatory properties. Additionally, they have a peppery flavor that can add a unique taste to salads and other dishes.