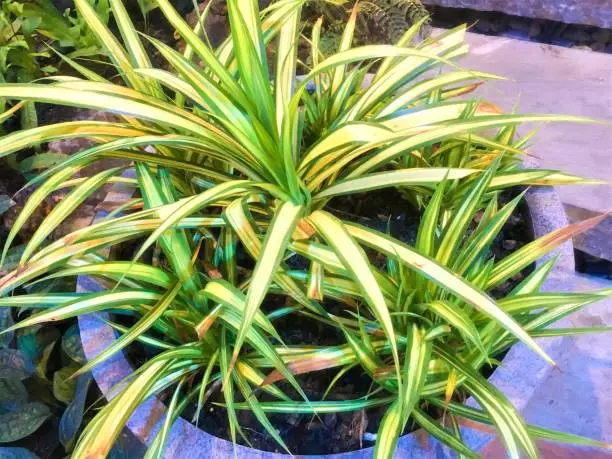
Healthy spider plants (Chlorophytum comosum) have long, grass-like leaves with green and white stripes. Any kind of discoloration and change such as spots and change of color is a sign something is wrong with the plant. Yellow leaves – in particular – can mean serious problems in the root zone, but there could also be more to the problem than you might think. So, why are the leaves of your spider plant turning yellow?
Yellow spider plant leaves are a sign of overwatering, fertilizer burn, iron deficiency, fluoride and chlorine in water, or light problems. Water the plant with distilled water only when the top 50% of the soil is dry and provide bright indirect light to stop the leaves from turning yellow.
I’ve also found that feeding your spider plant with an iron supplement such as Ironite Plus can help fix nutrient deficiency and make the plant turn green again. Below, I’ve explained the major causes of yellow foliage in spider plants, and how to diagnose and treat the plant.
Why is my spider plant turning yellow?
Improper care practices are the major cause of leaf pale leaves in spider plants. For starters, it is an indication that the optimal growing conditions are not being met. For most people, a poor watering schedule is the main cause of leaf yellowing and root rot disease in indoor plants, but there are many other reasons for the same.
Here’s why spider plant leaves turn yellow:
1. Overwatering
Yellowing leaves are a common sign of waterlogging that results from overwatering your spider plant. The discoloration results from the plant’s inability to absorb nutrients and translocate them from the roots to the leaves.
RELATED: HOW TO REVIVE OVERWATERED SPIDER PLANTS
Overwatering also makes it difficult for the spider plant to breathe, which is why the leaves start losing color and turning yellow. You may also start seeing brown tips on your spider plant as an additional sign of sitting in soil that’s too wet.
If you suspect that your spider plant may be overwatered, check the soil first to see if it’s too wet by sticking a finger into the ground and feeling for moisture. If the dirt is moist or has water seeping up from below, you’re probably dealing with an overwatering problem.
Note that overwatering can also cause other problems including the following:
- Root rot fungal disease
- Nutrient leaching that leads to poor nutrition
These two problems can also contribute to the yellow spider plant tips and even whole leaves appearing droopy. Keep in mind that air circulation in the root zone helps prevent their roots from rotting.
2. Chlorine and fluoride-contaminated water
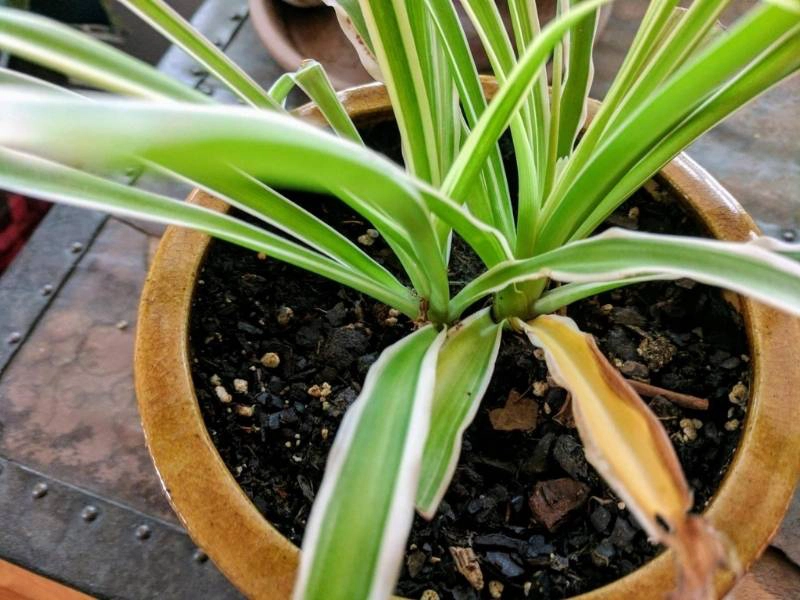
Spider plants are sensitive to chlorine, fluorides, and other toxic chemicals in tap water. When spider plant leaves turn yellow or brownish-yellow, it could be a reaction to the presence of these substances in your home’s water supply.
If you recently started watering your spider plant using tap water, you’ll start seeing the signs of chlorine and fluoride intoxication manifesting in their leaves. Fluorine toxicity inhibits important plant functions including photosynthesis. The spider plant then starts to show signs of yellowing on the edges of the leaves. If left without fixing, the whole plant will turn yellow, then brown, and die off slowly.
3. Excessive exposure to sunlight
Spider plants can typically tolerate low light conditions but they prefer to grow in bright indirect sunlight. If the spider plant is overexposed to direct sunlight, its leaves will start turning yellow and even browning as a result of scorching and heat stress.
In most cases, the leaves will turn from their normal color from yellow to brown, which is an indication that the plant is from offering heat stress and is probably dying off gradually.
Note: Fungal diseases can also manifest similar symptoms especially if some of the leaves on your spider plant are in contact with water for prolonged periods.
4. Overfertilization
Fertilizer burn occurs when excess salts in the soil due to overfertilization absorb moisture, leaving the plant without enough water. It results in damage to the roots and foliage. The leaves of your spider plant will start turning yellow within a day or two after applying fertilizer.
I would recommend that you start fixing the problem as soon as possible since it takes a few weeks to get rid of salt saturation in the pot except when you opt to repot the plant with fresh dirt.
5. Nutrient deficiency
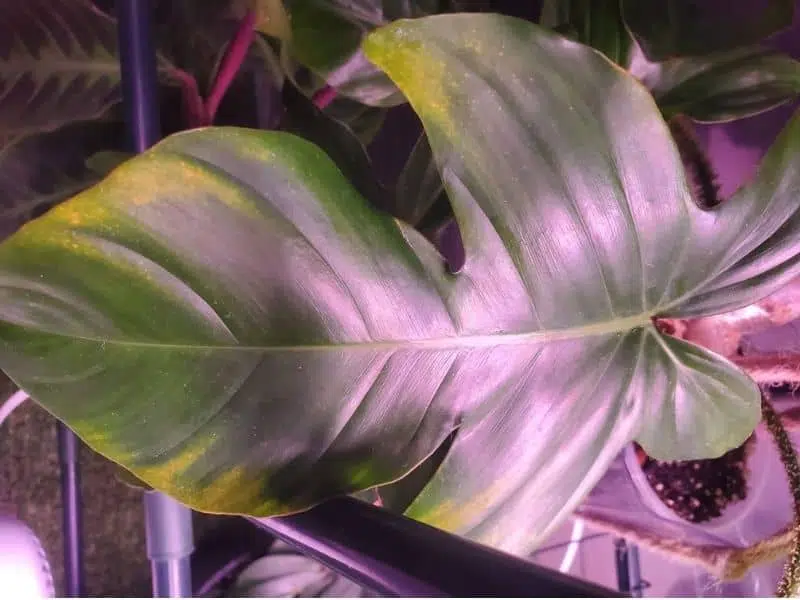
Leaf yellowing that’s caused by nutrient deficiency is called chlorosis. It is characterized by pale yellow foliage with yellow streaks appearing between the veins. Potassium and iron deficiency are the two most common nutrient deficiencies that cause spider plant leaves to turn yellow.
Iron chlorosis is an iron deficiency disorder that causes plants to have yellowing between veins with green or purple hues on leaf margins and tips of unfolding leaves. The leaves are often a lighter shade of green than normal while they’re also less shiny and stiffer in texture.
Potassium deficiency manifests as several dark spots near the base of the petiole (leaf stalk) but can also appear on upper surfaces if left untreated for too long with potassium fertilizers and other necessary nutrients in the soil mix.
6. Old foliage
A spider plant’s old leaves will turn yellow as a result of losing their photosynthetic capability. These leaves can make your plant look ugly, so it is a great idea to prune them off since they cannot turn green again.
Be careful to prune foliage that’s located at the bottom of the stem and is turning yellow. Discoloring leaves towards the top of the wiry stems may be a sign of another underlying problem that you want to look into.
Apart from the causes listed above, other factors that can cause faded spider plant foliage include the following:
- Pests
- wrong pot size
- Cold drafts
The important thing is to provide a suitable environment for the spider plant to blossom in.
How to fix yellowing spider plant leaves
A spider plant’s beauty is elegant and curled foliage with green and white variegation. If your spider plant leaves are yellowing, that’s a signal that something is wrong somewhere.
Here’s how to fix yellow spider plant leaves:
1. Provide indirect sunlight
Spider plants prefer bright indirect sunlight to thrive. They can tolerate partial shade, but they may grow slowly or even appear to have a pale-yellow color if the shade is too much. Low light conditions affect photosynthesis and the general health of the plant.
- Move the plant and place it near an east-facing window where it will receive bright indirect light.
- If the sun is too bright, install a light curtain or shears to help filter the sun.
RELATED: PLANTS THAT ARE BEST IN EAST-FACING WINDOW
Overexposure to direct sunlight often leads to the yellowing of the leaves and will manifest as leaf burn. Ensure the plant receives enough morning and evening sunlight if possible.
2. Water when the top 50% of soil is dry
The soil around your spider plant should be moist but not saturated or wet. Too much water affects air exchange between the roots and the soil.
Spider plants need to dry out between watering sessions by leaving the soil barely moist–just enough for the surface of the potting mix to be damp right after you’ve watered them. Depending on the size of the pot and the draining holes, water the plant once every 1-2 weeks.
These are general watering guidelines, so you must always check the soil using your index finger to determine if the plant needs water or not.
Pro tip: If there are a lot of yellow leaves, it might be an indication of decaying roots. If this is true, treat root rot with a weak hydrogen peroxide solution then replace your plant’s potting mix. You might also need to make holes around the pot to help prevent waterlogging.
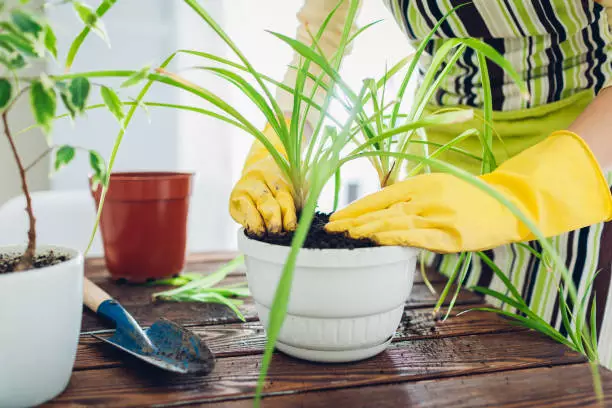
3. Repot the spider plant
If the spider plant is suffering from root rot, it’s probably time to repot your plants. It helps naturally stop leaf yellowing and provides new soil that’s free from fungus and is rich in nutrients for your plant to grow well.
To repot the plant, remove it from the waterlogged pot, cut away the affected roots and treat the remaining ones. Fill a new pot that’s at least one and a half to two times bigger with a fresh potting mix (not expired), then transplant the plant. Move it to a shaded place and water lightly until it recovers from the potting shock.
Note: spider plants have a tendency to overrun the containers (pots) in which they are put. Look for a larger container that will allow your plant to develop. If your spider plant becomes too large for its new container, you can divide the root ball to generate many little yet healthy plants.
4. Flush out excess fertilizer
To stop salt saturation from building up in your pot, I recommend that you flush out excess fertilizer with plenty of water. Pour water from a container two times the size of the pot into the plater once daily to wash away the excess salts.
Make sure there are enough draining holes in the pot to prevent water from sitting and suffocating the plant – which can worsen the leaf-yellowing problem.
5. Feed the plant to fix the nutrient deficiency
When leaf yellowing is caused by nutrient deficiency, you should feed the plant with a fertilizer that has both nitrogen and potassium. Nitrogen is an essential nutrient for plants, but the ideal plant food for this problem should have potassium and an iron supplement to help fix chlorosis.
I recommend using an iron-rich supplement for plants such as this Ironite Plus or Milorganite.
6. Water the plant using distilled water
If you’ve determined that the reason for the leaves of your spider plants turning yellow is chlorine and fluoride in water, the best fix is to change the water you’re using for watering the plant.
Use filtered or distilled water for watering spider plants until you can switch over from using chlorinated or fluoridated city tap water. Keep an eye on spider plant leaves as they may continue discoloring at first after switching out their normal intake of unfiltered city tap water with filtered or distilled bottled water.
This is normal because fluoride toxicity occurs over time and will take some time to get fixed unless you repot the plant with a new potting mix to speed up the detoxification process.
RELATED: HOW LONG DOES IT LAST FOR POTTING SOIL TO BECOME BAD AND EXPIRE?
Can yellow leaves turn green again?
Yellow leaves can’t turn green again, especially if the change is extensive. If you correct the underlying problem such as overwatering, new, healthy foliage will emerge and your spider plants will look great again. Prune away the old yellow leaves to allow the plant to grow fresh foliage.
As mentioned earlier, insufficient watering and lighting are the major causes of yellow leaves on spider plants. But other factors like over-fertilization, pests, and temperature extremes are potential agents of yellowing in plants.
While it is close to impossible to reverse the yellowing, if a leaf has a little discoloration caused by insufficient nourishment or moderate stress, it may sometimes green up again if the problem is treated immediately.
After these yellow leaves are shed, they give room for new fresh leaves to sprout. A few yellow leaves should send a warning to you that there’s an issue that should be addressed immediately.
So with the above arguments, we could say that it is possible to reverse the yellowing process. However, the probability of yellow leaves turning back to green for house plants is close to zero. When a leaf turns yellow, it may never go back to its normal color (green). Although, if the yellowing process is noticed at its early stages, it could be stopped.