Thyme is a relatively easy plant to grow both indoors and outdoors because it is good at thriving in places where many plants struggle to grow. With proper care, you can grow thyme indoors if you have enough light coming in through your windows and potting soil that’s slightly alkaline.
To grow thyme indoors, you’ll need a well-draining, nutrient-rich potting soil with an alkaline pH. Occasional watering and feeding thyme with a good organic fertilizer will keep it flourishing. Indirect sunlight is enough, so you can grow thyme near windows in your house especially if you maintain the indoor temperatures between 62°F and 70°F.
Light pruning also helps in maintaining its bushy compact size. Thymes thrive well in direct or indirect sunlight or LED growing light. The best optimal temperature for the growth of thymes is 17-210C.
| Sunlight requirements | At least 6 hours of direct sun per day. |
The most common variety of thyme (Thymus vulgaris, also called French thyme) is both a culinary and an ornamental herb. It is a versatile herb with several beneficial uses.
Can you grow thyme indoors?
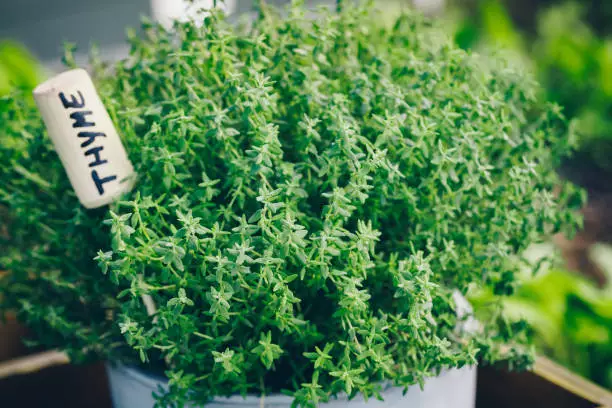
You can grow thyme indoors if you have windowsills that allow in plenty of light because it requires direct bright sunlight. You can grow it as a potted plant indoors under a bright LED grow light, pruning, propagating, and repotting it to maintain shape and prevent pests.
Thyme is a low-growing hardy perennial herb that requires little care.
- It prefers watering after the soil completely drains
- You’ll need to turn the pot now and then to ensure all sides receive light.
- Maintain proper temperature when growing thyme indoors.
Below is a complete guide on how to grow thyme indoors for an all-year supply of this great culinary herb.
How to grow thyme indoors
To grow thyme indoors requires less attention and care.
The best place to grow them is in a pot. Use a clay pot planter with sizeable drainage holes to improve water drainage. Waterlogged conditions cause root rot disease in thyme and many other indoor plants.
Here is the potting procedure to start your indoor thyme garden:
- Add a sterile potting mixture of sandy, peat moss, potting soil, and perlite in dry clean clay.
- Water the potting mixture just enough.
- Place either your thyme seeds or propagates in the planter to grow.
- Fertilize your thyme every two weeks using a weak solution of fish emulsion.
- Occasionally, add fertilizer in nitrogen, potassium, and phosphorous in a 1:1:1 ratio.
- Water the thyme plants when the topsoil dries to the touch.
- Add a layer of organic mulch to give them a tidier look after the herb establishes.
Soil requirements for growing thyme indoors
Plant your thymes in sandy well-drained soils with an optimum pH level of 7.0. The ideal potting mix should be light and airy to facilitate fast draining. An airy potting mix enhances soil aeration and gives roots enough space for development.
Watering thyme
Thyme is a drought-resistant herb that does not need a lot of water. However, keep the soil evenly moist until plants are well-rooted. For well-established thymes, water to one-inch depth every 10-15 days. Only water when the topsoil dries to the touch. Frequent watering of thymes can cause root rot.
Fertilizer
Fertilize your thymes every two weeks using a weak solution of fish emulsion. Occasionally, add fertilizer rich in nitrogen, phosphorous, and potassium in a 1:1:1 ratio. Once the thymes establish well, use a nutrient-rich organic mulch. Mulch deters weeds and keeps the lower stem neat and less vulnerable to external forces.
Light requirements for thyme plants
Thymes need either indirect or direct sunlight to flourish well. Indoors, place the plant pot in a sunny window that receives sunlight for at least six. Or, use LED growing light for your indoor thymes.
Pest and Bug Control
Thymes are susceptible to pests and bugs such as spider mites and aphids. The ideal method to control pests and insects is by use of less-toxic approaches. Below are some of the practical less-toxic pest control approaches: Weeding and removal of all garden debris to eliminate pests and bugs hosts. Remove and dispose of infected plants in a trash bin. Use of beneficial commercial insects to attack and destroy pests and bugs. Use organic pesticides such as neem oil to control pests and bugs.
How to propagate thyme
Propagation is the process of producing a new from either the stem or root of the parent plant. There are three ways of propagating thymes. The propagation methods include:
1. Propagation from cuttings
This propagation method involves cutting a young thyme system. It is a less involving method. But, with improper handling, it is bound to fail.
- Paper clip a 3-inch long soft stem from the tip.
- On the wounded part, apply a rooting hormone.
- Plant the stem in germ-free perlite, vermiculite, or sand. Ensure the exposed part of the stem with rooting hormone, is what goes into the ground.
- Roots emergence takes place within six weeks.
- After root emergence, transfer the propagated thyme into a small plant pot. This is to enhance the formation of the root ball or root mass.
- Finally, transplant the propagated thymes into a large plant pot or garden.
2. Layering propagation
In layering propagation, a stem part develops roots while still attached to the main plant. The rooted stem then detaches and grows independently from the parent plant. Layering propagation produces healthy and vigorous propagates.
There are two methods of layering propagation:
- Layering using sphagnum moss.
- Propagating directly into the soil.
Below are the two methods of layering propagation:
Using sphagnum moss
- Choose the stem to stem to propagate.
- Remove leaves from the stem to remain a 10-20 leafless stem.
- Make an upward slanting cut on the part to root. The cut should cover about half of the stem part to the root.
- Place a piece of plastic on the cut to prevent it from closing.
- Wrap the cut wound with a fist-size damp sphagnum moss. Roots grow in sphagnum moss without any soil.
- Cover the section with sphagnum moss using a transparent plastic bag. The transparent bag helps track root development.
- In a couple of weeks, roots will start to emerge.
- When you see well-developed roots, remove the plastic bag and cut the stem right below the moss ball.
- Transplant the thyme in a plant pot or a garden.
Propagating directly into the soil
- Choose a long thyme stem.
- Remove leaves from the stem to remain with a 10-20 com long leafless stem.
- Make an upward slanting cut on the part to root.
- Using wire, secure the part of the stem along with the soil. Ensure the cut comes into direct contact with the soil.
- In about six weeks, roots will start to show.
- Cut off the propagated thyme from the parent plant.
- Transfer the thyme propagates either into a plant pot or in a garden.
3. Root division propagation
This is the easiest method of propagating thymes. The root division propagation method involves dividing thyme bush into smaller sections with roots. Transfer the parts into a plant pot or in a garden. Regardless of the propagation method, always plant thyme propagates at a temperature of 15-21°C. About two to three weeks before the last winter frost.
How long can you keep thyme?
Fresh thyme usually lasts for about 10 to 14 days in the refrigerator and about 4 to 6 months in a freezer. To store in a fridge, wrap the thyme in a damp paper cloth or place it in a zip-lock plastic bag. To freeze your thymes, wash and dry the leaves. Place the dry leaves in heavy-duty zip-lock freezer bags and put them in the freezer.
Dry powder thymes can usually for about 1-3 years. Store the powdered thymes in storage containers with tight-fitting lids. Store the storage containers with thyme at room temperature.
How long does thyme take to grow from seed?
It can be challenging and time-consuming to grow thymes from seeds. The germination process is slow and takes 14 to 28 days. Seeding thymes requires a temperature of 15-21°C. That is why most gardeners opt for propagation.
Sow the dust-like thyme seeds in a wet sterile potting mix. Either scatter the seeds or place them in shallow rows.
Cover the seeds to enhance heat. Or, grow them under brown light with bottom heat. After roots start showing, transplant the thymes into a plant pot or the garden.
If in small gardens, space the plants to about 9 inches apart. If on large scale, space the thymes 12-18 inches apart in rows one meter apart. The spacing enhances the production of thyme leaves.
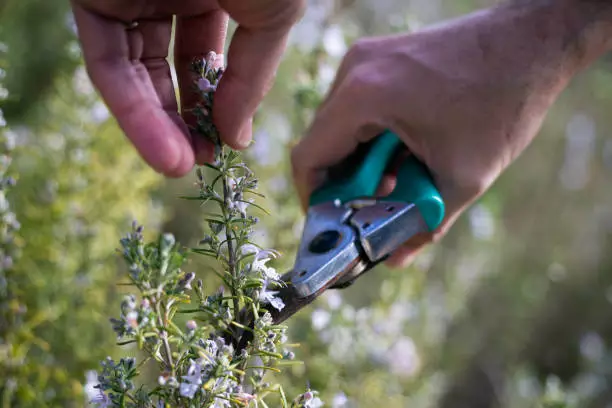
Harvesting potted thyme
Harvesting of potting thymes can take place all year long your, right before flowering. Thymes fragrance is very concentrated when flowering, deterring the majority from consumption. Thyme tastes great either fresh or after drying. Mass harvest thymes before they start blooming and dry them to prolong shelf life. Most people also use flowers to decorate salads and in food marination.
Here is the harvesting procedure:
- Cut soft stems in the morning behind the hard woody stems. Harvesting in the morning gives you clean leaves.
- Cut the thyme plant 3-5 inches from the ground. This prevents plants from hardening in the winter.
- Regular harvesting encourages growth and gives the herb a rounder neat shape.
- After harvesting, dry the cut plants on sheets of newspaper in a warm shade.
- Separate the leaves from the woody stem.
- Crush the leaves either in a grinder or mortar and pestle them and use them as additives in your meals.
- Replace your thymes in every 3-4 years after they become woody and undesirable.