There are two simple ways of growing mustard microgreens: you can either grow them with soil or use the dome method, which doesn’t require any soil. Within 5-14 days, they’ll be ready for harvesting and consumption.
Prepare a growing medium on a tray then soak the mustard seeds for 1 day. Broadcast the seeds on the soil, mist them with water, then cover them with a tray and place them in the dark to germinate. Remove the cover after 3 days and provide light and water for 5-14 days. Harvest the mustard microgreens.
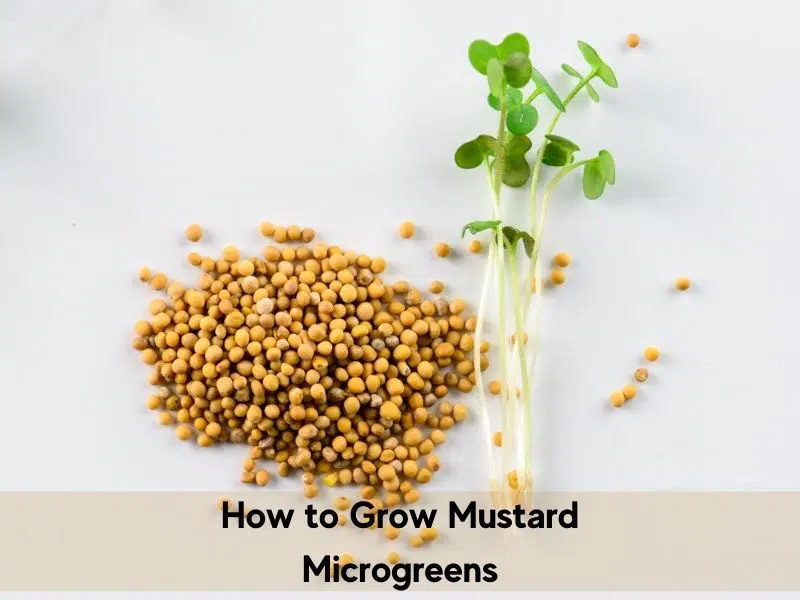
How to grow mustard microgreens
Mustard microgreens come in different varieties, such as the red garnet variety, Osaka Purple Mustard, Mizuna Mustard, Greenwave Mustard, and Red Giant Mustard. To make your garden stand out, incorporate a good number of them.
Here’s what you’ll need:
- Seeds – select high-quality mustard microgreen seeds
- Containers – have at least two shallow trays, one without drainage holes and the other one with drainage holes (you can punch the holes yourself). Opt for plastic, ceramic, earthen, or whatever container is available to you. These trains need to be sturdy, reusable, and consistent in size.
- A fine-grain growing medium – Mustard microgreens have a delicate root system and would find it hard penetrating through soil full of debris. Alternatively, use coconut coir or grow them hydroponically.
- Light- go for quality grow light. Grow light assists these mustard greens in growing straight up and uniformly.
- Sharp scissors or kitchen knife.
- Spray bottle
Once you have everything ready, you will want to prepare your growing medium and the seeds for planting.
Here’s how to grow mustard microgreens (step by step):
1. Soak the mustard seeds
Mustard microgreens seeds don’t require any soaking before planting. They turn soft and sticky when placed in water because of their tiny, round, and dark nature. Also, it’s pretty difficult to plant a mass of goop.
2. Fill the drainage holes with soil
With all the supplies at hand, proceed to plant. Fill the drainage holes with soil almost full to the brim. Smooth the surface with your hands. Using a spray bottle, moisturize the soil. Use your palms or something flat to tamp down the soil.
3. Broadcast the seeds over the prepared soil
Next, sprinkle the mustard seeds across the soil surface. Use your hands or a shaker bottle with holes around 3/16 in diameter. The seeds need to be close enough to grow a mat of greens but far apart to enable good aeration in the trays.
You don’t want some areas without seeds and areas with clumps of seeds. The seeds should stay in place, and because of the damp soil, they’ll start germinating right away.
4. Cover the seeds with a tray
Take your second tray (one with no soil) and place it directly on top of the seeds. The tray needs to block the light out and also press the soil down. Also, you can add more weight to the tray to help press the seeds further into the soil. The weight could be a piece of metal, a large rock, a big rock, or anything that can exert pressure.
The process helps the roots grow down and firmly into the growing medium. Don’t add excess weight as the mustard plant can only hold 2 pounds top, unlike other microgreens that can tolerate up to 5 pounds.
5. Keep the seeds in the dark for 2-3 days
Mustard seeds take approximately 2-3 days once planted to germinate. During this period, keep the cover for the seedlings to remain in the dark.
6. Mist the soil daily
Also, check the soil daily and ensure it’s well moisturized; if not, mist the soil. If you see white things, don’t panic, as most likely, these are only hairs.
7. Remove the cover and provide a grow light after germination
The mustard microgreens will push the cover as they continue to grow. Once the cotyledons start being visible, removing the cover and adding grow light is a sign. The light should be about 12 inches above the trays. Keep the light on for 14-16hours a day, and let the plants rest the remaining hours.
Alternatively, place them in an area where they receive indirect sunlight. The leaves may look yellow from lack of sunlight, but they will turn to their green colour after receiving light.
8. Water the mustard microgreens from the bottom
When the microgreen continues to grow, ensure that the soil is always moist. Once the soil starts drying out, water the plants. Don’t water from the top; instead, put water into the watering tray, then let the soil soak up the water from the bottom.
The bottom-watering method is the best for keeping the mustard microgreens plants hydrated. It ensures you don’t add excess moisture to the soil surface that invites bacteria growth. Note that microgreens, unlike sprouts, carry the risk of bacteria if not handled properly. See the difference between microgreens and sprouts.
RELATED: WHAT ARE THE DIFFERENCES BETWEEN MICROGREENS AND SPROUTS
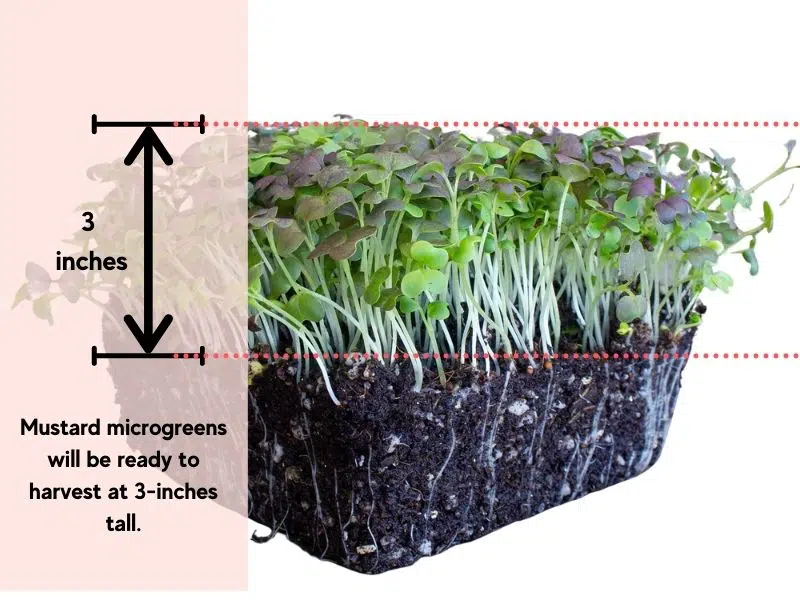
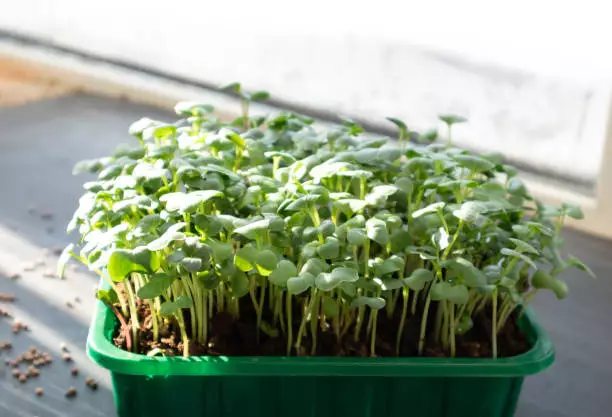
9. Harvest mustard microgreens after 5-14 days
Mustard microgreens are ready for harvesting between 5 and 14 days from the planting day. To harvest, use a sharp knife or scissors to cut the microgreens just above the medium. To know when it’s ready, the cotyledon will fully open and the microgreen will be about 1-3 inches tall. Harvest these plants before the true leaves show up, as their taste and texture change fast.
Mustard microgreens taste
Mustard microgreens are enjoyed in steamed, boiled, stir-fried, or even pickled foods. These greens have a sweet-hot mustard flavor. Also, It’s spicy and zestier than regular microgreens. When you put these microgreens into your mouth, the first thing you notice is their crispy texture, followed by the freshness and, finally, the spicy taste.
The benefits of mustard microgreens
Mustard microgreens, just like cilantro and arugula are highly nutritious with extremely high levels of antioxidants. They contain vitamins A, B6, C, E, K, fiber, calcium, folate, protein, and potassium. Most chefs have introduced these microgreens to their dishes to promote better health.
RELATED: HOW TO GROW CILANTRO MICROGREENS
Here are some of their benefits:
- Vitamin C and phytonutrients help in maintain a stronger immune system.
- It helps in relieving congestion and clearing out sinuses.
- Vitamin K assists in the clotting of blood. It additionally reduces the chance of developing heart diseases, osteoporosis, impaired brain functioning, and Alzheimer.
- Help in fighting diabetes and other lifestyle diseases.
- Contain zeaxanthin and lutein, which are great for eye health.
- Detoxify the liver and blood- when eaten, they help in eliminating toxins from the liver and blood.
- It hinders the growth of cancer cells because of high antioxidant levels.
- Have anti-inflammatory properties thus providing relief to persons with arthritis.
- Microgreens stimulate healthy hair growth.
- The phytonutrients like phenols and glucosinolates help in protecting the body from environmental distress.
RELATED: HOW TO GROW ARUGULA MICROGREENS
Mustard microgreens are leafy greens that take a few days to grow and harvest. Apart from adding texture and impeccable taste to your food, they also come with many health benefits.